Simplifying the visa process for study in USA
Study in USA is a dream for many international students seeking world-class education and career opportunities. However, navigating the student visa process can be complex and overwhelming. In this guide, we’ll simplify the study in USA student visa process to help you understand the requirements and steps involved in obtaining a student visa.
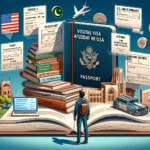
visa process for study in USA
1. Determine Visa Type:
- The primary visa for international students studying in the USA is the F-1 student visa. If you are enrolled in an academic program at a U.S. college, university, language school, or other academic institution, you will likely need an F-1 visa. For exchange visitors, the J-1 visa may be applicable.
2. Receive Form I-20 or DS-2019:
- Once you are accepted into a SEVIS-approved school in the USA, the institution will issue you a Form I-20 (for F-1 visa) or DS-2019 (for J-1 visa). These forms are necessary for applying for a student visa and demonstrate your acceptance and enrollment in a U.S. academic program.
3. Pay SEVIS Fee:
- Before applying for a student visa, you must pay the SEVIS (Student and Exchange Visitor Information System) fee. Visit the SEVIS website, complete the required information, and pay the fee online. You will need the SEVIS ID number from your Form I-20 or DS-2019 to complete this step.
4. Complete the Online Visa Application (DS-160):
- Fill out the DS-160 online nonimmigrant visa application form. Provide accurate and complete information about your personal background, academic history, travel plans, and intended stay in the USA. Upload a digital photograph meeting the specified requirements.
5. Schedule Visa Interview:
- After completing the DS-160 form, schedule a visa interview at the nearest U.S. embassy or consulate in your home country. Visa interview wait times vary by location, so plan accordingly and schedule your interview well in advance.
6. Gather Required Documents:
- Prepare the necessary documents for your visa interview, including:
- Passport valid for at least six months beyond your intended stay in the USA.
- Form DS-160 confirmation page with barcode.
- Form I-20 or DS-2019 issued by your academic institution.
- SEVIS fee payment receipt.
- Visa application fee payment receipt.
- Proof of financial support demonstrating your ability to cover tuition, living expenses, and other costs while studying in the USA.
- Academic transcripts, standardized test scores, and any other relevant academic documents.
- Passport-sized photographs meeting the specified requirements.
- Additional documents as requested by the U.S. embassy or consulate.
7. Attend Visa Interview:
- Arrive at the embassy or consulate on the scheduled date and time of your visa interview. Bring all required documents and be prepared to answer questions about your academic plans, financial situation, ties to your home country, and intent to return after completing your studies.
8. Provide Biometric Information (if applicable):
- Some visa applicants may be required to provide biometric information, including fingerprints and photographs, as part of the visa application process. Follow the instructions provided by the embassy or consulate regarding biometric collection procedures.
9. Await Visa Processing:
- After your visa interview, the consular officer will review your application and make a decision on whether to approve or deny your visa. Processing times vary by location and time of year, so be patient while awaiting a decision.
10. Receive Visa and Travel to the USA:
- If your visa application is approved, your passport will be returned to you with the visa stamp. Verify the visa information for accuracy and review any visa restrictions or conditions. Make travel arrangements to the USA and prepare for your academic journey.
Conclusion:
Navigating the USA student visa process requires careful planning, attention to detail, and adherence to visa requirements. By understanding the steps involved and preparing thoroughly for your visa application and interview, you can streamline the process and increase your chances of obtaining a student visa to study in the United States. Remember to consult official resources, follow instructions provided by the U.S. embassy or consulate, and seek guidance from your academic institution or a qualified immigration advisor if needed. With proper preparation and documentation, you’ll be on your way to fulfilling your academic aspirations in the USA.